Bringing Holiday Magic to Life with a Christmas Pop Up Card
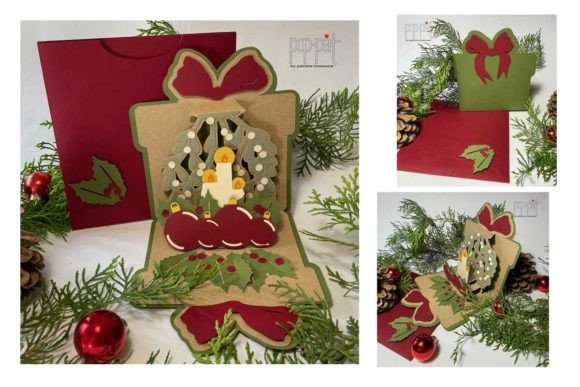
There is something undeniably special about holding a handmade card that leaps off the page. In an era dominated by digital greetings and fleeting text messages, a Christmas Pop Up card offers a tangible moment of surprise and joy. It transforms a simple holiday wish into an interactive experience, creating a memory that recipients often keep long after the season has passed. Whether you are a seasoned crafter looking to streamline your production or a beginner eager to create something impressive without complex engineering, digital cut files have revolutionized how we approach this classic art form.
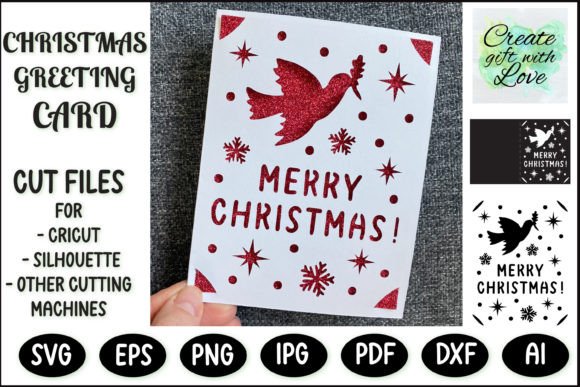
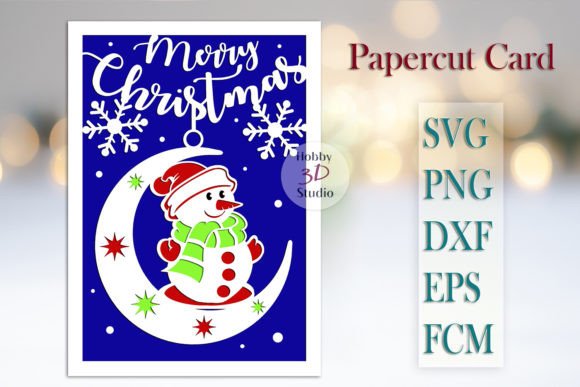
The concept of a pop-up card relies on paper engineering—using folds, tabs, and layers to create three-dimensional structures when the card is opened. Traditionally, this required precise measuring, scoring, and cutting by hand, a process that could be time-consuming and prone to error. Today, leveraging files compatible with machines like Cricut, Silhouette, and Brother Scan-N-Cut allows creators to focus on the creative assembly rather than the tedious prep work. By utilizing formats like SVG, DXF, and PDF, you gain access to intricate designs that would be nearly impossible to replicate freehand, ensuring clean lines and perfect symmetry every time.
Real-World Applications Beyond the Mailbox
While sending cards to friends and family is the most obvious use case, the versatility of a Christmas Pop Up design extends far beyond traditional correspondence. Consider the small business owner or Etsy seller looking to elevate their brand during the holidays. Including a stunning, dimensional card in every product package can turn a standard transaction into a memorable unboxing experience. This extra touch fosters customer loyalty and encourages social media sharing, effectively turning your customers into brand ambassadors.
Teachers and educators also find immense value in these projects. Creating pop-up cards can serve as an engaging classroom activity that combines art, geometry, and fine motor skills. Instead of a standard worksheet, students can assemble pre-cut pieces to learn about structural integrity and spatial reasoning. The result is a festive decoration they can take home, proud of the complex structure they helped build. Similarly, corporate event planners use these designs to create unique invitations for holiday parties or centerpieces for gala dinners. A table scattered with 3D paper trees or snowflakes adds an immediate layer of sophistication and whimsy to any venue.
For those involved in scrapbooking or memory keeping, these elements act as powerful focal points. Integrating a pop-up mechanism into a holiday layout allows the viewer to interact with the page, revealing hidden photos or messages beneath the layers. It transforms a static album into a dynamic storytelling device, capturing the spirit of the season in a way that flat images simply cannot.
Navigating File Formats and Machine Compatibility
One of the most critical aspects of successfully creating these projects is understanding the digital tools at your disposal. When you download a design bundle, you will typically encounter multiple file formats, each serving a specific purpose depending on your hardware. For Cricut users, the workflow is streamlined but requires attention to detail. You should specifically open the SVG_Cricut folder included in your download. Inside, you will often find important notes regarding layering, sizing, and material settings. Ignoring these instructions can lead to frustration, such as cuts that don't align or pieces that are too fragile to handle.
If you are using Silhouette Studio, the DXF files are usually your best friend, offering compatibility across both the basic and Designer editions of the software. These files allow you to manipulate individual nodes and adjust the scale without losing cut quality. Meanwhile, PDF files are indispensable for those who may not own a cutting machine but still want to achieve a professional look. You can print these directly onto cardstock and use a craft knife or scissors for manual cutting, though this method naturally requires more patience and precision.
Brother Scan-N-Cut users benefit from the ability to scan physical patterns or import SVGs directly, bridging the gap between digital design and tactile crafting. Regardless of the machine, the key is to respect the material limitations. A design intended for heavy cardstock might fail if attempted with thin printer paper, just as a delicate filigree pattern might tear if the blade pressure is set too high. Taking the time to perform test cuts on scrap material is a non-negotiable step that saves both time and supplies in the long run.
Choosing the Right Materials for Durability and Impact
The success of a Christmas Pop Up project hinges heavily on material selection. The mechanics of a pop-up rely on the "memory" of the paper—its ability to return to its original shape after being folded. Standard copy paper lacks the rigidity needed to support 3D structures and will likely collapse under its own weight. Conversely, overly thick chipboard might be difficult to fold cleanly without cracking. The sweet spot for most projects is cardstock ranging from 65 lb to 80 lb cover weight.
Texture and finish also play a role in the final aesthetic. Matte finishes tend to photograph better and offer a classic, elegant look, while shimmer or glitter cardstocks can catch the light beautifully, enhancing the festive theme. However, be cautious with heavily textured papers, as they can sometimes interfere with the adhesive bonding or cause the cutting blade to drag. When assembling, the choice of adhesive is equally vital. Liquid glues can warp thin paper, and glue sticks may not provide enough hold for structural tabs. Double-sided tape or specialized craft glue dots often provide the strongest, cleanest bond, ensuring your pop-up mechanisms snap open and shut smoothly hundreds of times.
Creative Customization and Personal Touches
Digital files provide the skeleton, but your creativity provides the soul. One of the greatest strengths of using cut files is the ease of customization. You aren't locked into the colors provided in the preview image. Imagine creating a pop-up scene that matches the recipient's favorite holiday color scheme, or incorporating monograms and names into the design using your machine's writing tools. You can layer different shades of green to create depth in a Christmas tree or add metallic accents to a starry night scene.
Furthermore, these designs invite mixed-media experimentation. Once the paper structure is assembled, there is ample opportunity to embellish. Adding sequins, ribbon, or even small LED fairy lights can transform a paper craft into a glowing centerpiece. For a more rustic approach, tying the card with twine and attaching a sprig of dried lavender or pine adds a natural, aromatic element that engages the senses beyond just sight.
Practical Considerations Before You Start
Before diving into a large batch of cards, it is wise to consider the logistics of mailing. While a flat card slides easily into a standard envelope, a Christmas Pop Up card often requires extra protection. If you plan to mail your creations, you must account for postage costs, as dimensional cards often incur additional fees or require bubble mailers to prevent crushing. Some crafters choose to design their pop-ups so they can be flattened for mailing and then re-expanded by the recipient, though this limits the complexity of the engineering.
Time management is another factor. While the machine does the cutting, the weeding (removing excess material) and assembly phases are manual processes. A complex design with many small layers can take twenty to thirty minutes per card to assemble properly. If you are planning to make fifty cards for a neighborhood drive, ensure you have allocated enough uninterrupted time for the assembly line process. Breaking the task into stages—cutting all pieces one day, weeding the next, and assembling over the weekend—can make the project feel less daunting and more enjoyable.
Ultimately, whether you are crafting for profit, education, or personal connection, the journey of creating a Christmas Pop Up card is rewarding. It bridges the gap between technology and tradition, allowing modern makers to produce heirloom-quality items with efficiency. By understanding your tools, respecting the materials, and embracing the potential for customization, you can create holiday treasures that bring genuine delight to anyone lucky enough to receive them.